Every buyer you sell to gets a client account. It holds their details and your profit margin, and gives them their own order page, where you or they can place orders.
1 Your client list
Click Clients in the menu. You see only the clients you created.
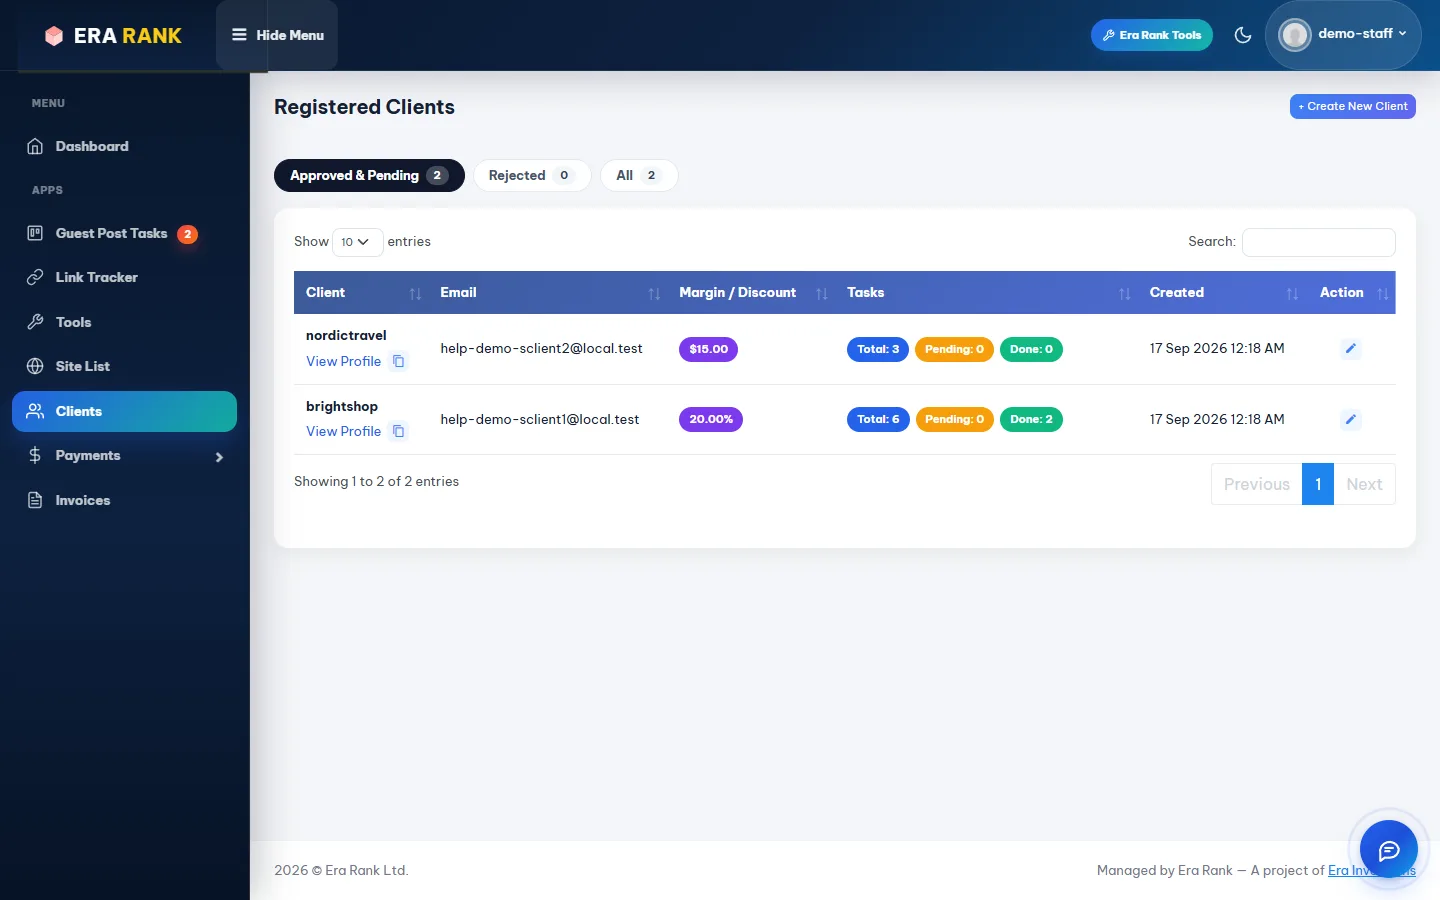
Each client with their margin and a count of their orders.
| Column | Meaning |
|---|---|
| Client | View Profile opens the client's order page. The copy icon copies its address, so you can send it to the client. |
| Margin / Discount | Your margin for this client: a dollar amount or a percentage. |
| Tasks | Total, pending and finished orders. |
| Action | The pencil icon edits the client. |
The tabs at the top switch between Approved & Pending, Rejected and All clients.
2 Create a client
Click + Create New Client.
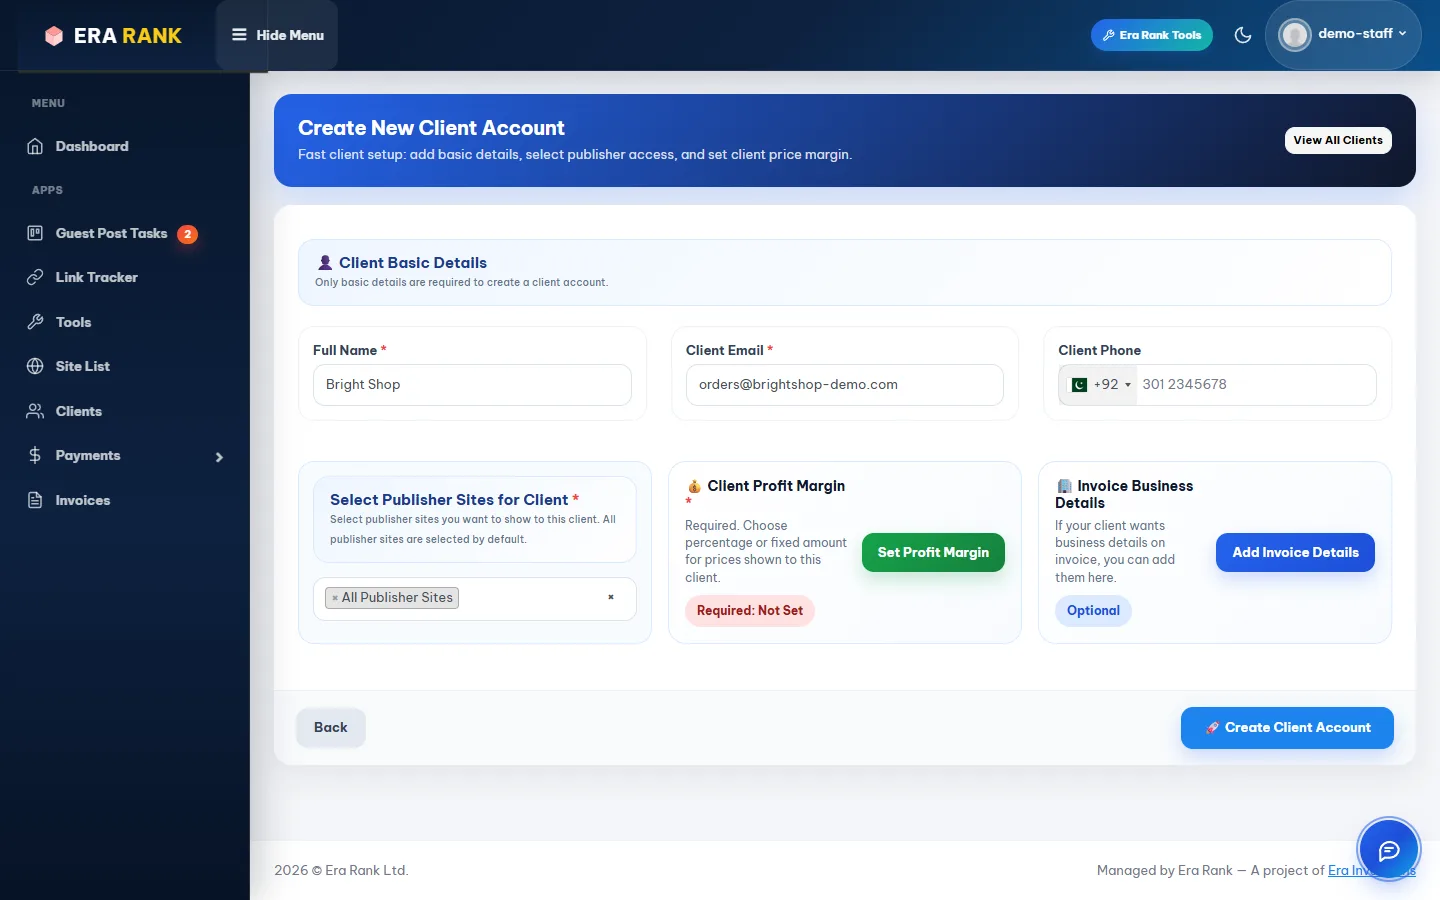
The Create New Client Account form.
| Field | What to enter |
|---|---|
| Full Name | The client's or company's name. Required. |
| Client Email | Required, and not already used by another account. |
| Client Phone | Optional. |
| Select Publisher Sites for Client | Which websites the client can see and order. All Publisher Sites is selected by default; leave it unless you want to limit the choice. |
| Client Profit Margin | Required. Click Set Profit Margin (see below). |
| Invoice Business Details | Optional. Click Add Invoice Details to add the business name, address, tax ID / VAT and country printed on the client's invoices. |
Click Create Client Account. The client doesn't get an email; send them their order page link yourself (step 4).
3 Set your profit margin

The examples update as you type.
- Percentage (%): the margin grows with the price. 20% on a $50 website makes it $60.
- Fixed Amount ($): the same amount on every website. $15 on a $50 website makes it $65.
Click Apply Margin. The client sees prices with this margin on their site list, and new orders are priced with it automatically.
A percentage suits clients who buy websites at very different prices. A fixed margin keeps your profit the same on every order, including cheap websites.
4 Share the client's page
Each client has a page at erarank.com/client/profile/…/guest-post-history. Copy it with the icon next to View Profile and send it to your client. From that page they can:
- browse the Site List at their prices,
- Post New Task to order,
- follow every order and open their invoices,
- see your contact details as their Era Rank contact.
Anyone with this link can see the page and place orders for that client. Only send it to the client.
5 Edit a client
Click the pencil icon in the client list. You can change the name, email, phone, websites, margin and invoice details. A new margin applies to new orders; existing orders keep their price.